

What are Zoom Webinars?
Zoom Webinars are designed for virtual events where panelists will be presenting to a large audience of attendees. While meetings are designed for team collaboration, webinars are the preferred solution for a “listen-only” audience to reduce the risk of disruption. Audience participation from attendees is possible with features like Q&A, chat, and polling, and UT webinars can scale from 100 to 3000 Zoom participants with additional overflow for viewers via Facebook Live or YouTube streaming.
You must acquire a webinar license through UT to be able to host webinars.
Meeting and Webinar Comparison Chart
Getting a Webinar License through UT
Zoom Webinar licenses are an add-on that can be purchased through ITS. Please submit a request to Zoom@utexas.edu, and we can guide you through the process and answer any questions.
Teams offers Webinars and Town Halls (formerly Live Events) as free alternatives, and all UT students, faculty, and staff can schedule Teams Webinars or Teams Town Halls at any time.
Scheduling Your Webinar in Zoom Portal
Creating your Webinar in the Zoom Portal
- Sign in to https://utexas.zoom.us/ using your UT EID and Password
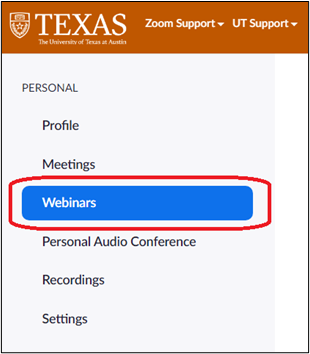
- Go to Webinars in the left panel
- Click Schedule a Webinar
- Fill out the webinar details (detailed below) and Schedule.
Webinar Settings
- Topic and Description for your meeting.
- Use a descriptive name for your Webinar in the Topic field.
- If this is a recurring webinar, do not put the date in the Topic, as the topic repeats for every recurrence.
- Time and Date settings for your meeting. You can also make the meeting a recurring meeting to re-use the same link and ID for multiple occasions.
- Requiring registration allows for you to require your participants to fill out a form before entering the meeting. The forms can be customized for your meeting’s needs.
- A Webinar Passcode may be set as an additional security method.
- Video options set whether cameras are on for the hosts or participant as soon as they join the meeting.
- These are recommended on, as this will only affect the Host and Panelists
- Audio settings let you choose whether participants can use Phone, Computer Audio, or Both.
- Both are recommended.
- Webinar Options
- Q&A and Practice Session are both recommended.
- Q&A is a Webinar feature that allows the attendees to submit questions moderated by Panelists. It is the most efficient and controlled way for attendees to participate.
- Practice Session allows for the webinar link to be used without being “live” to attendees. This is very useful for practice runs, hardware tests, and setup.
- Q&A and Practice Session are both recommended.
- Require Authentication to Join is recommended.
- Use UT Austin if your event is exclusively for UT affiliates.
- Sign in to Zoom allows non-UT affiliate Zoom accounts.
- Alternative Hosts are your backup hosts for managing the webinar. Assign as least one Alternative Host if possible.
- Alternative hosts will automatically become co-hosts when the host enters.
- Alternative hosts can launch and end the event in case the host has an emergency such as power or network outage.
- Reminder! Do not add hosts using personal or work email addresses. Add alternative hosts using the [EID]@eid.utexas.edu format.
Accessibility in Zoom
Zoom and UT provide multiple tools and options to ensure your remote meetings and webinars are inclusive and accessible.
From the Services for Students with Disabilities:
- Creating an Accessible Classroom
- Accessibility Best Practices for Meetings and Webinars in Zoom [PDF]
From ITS:
Preparing your team for a Webinar
Webinars require more planning and personnel than standard Zoom meetings. A detailed explanation of every Roles’ capabilities can be found here, but the following is a brief overview of each role and how to plan for them.
- The Host, by default is the licensed creator of the webinar. The host is exclusively able to launch and end the webinar, set up streams to Facebook Live/YouTube, assign Co-hosts, and make Polls. If you need somebody else to host, you can assign an alternative host in the Webinar settings before it begins.
- Enabling Practice Session in the webinar’s settings is highly recommended. This will allow your panelists to join the webinar, setup, and test before going live to Attendees. Plan for your panelists and co-hosts to arrive to the webinar 15 minutes before start for testing and setup.
- If you anticipate a larger number of attendees than your Webinar license will allow, the host can initiate a stream to Facebook Live or YouTube. Please ensure that your content is safe to share to public venues before using this option.
- Co-Hosts share most Host controls, but there can be multiple co-hosts in the Webinar. Co-hosts can be assigned once the Webinar begins and will assist in keeping the webinar flowing. Some best practices regarding co-hosts:
- Ensure you have AT LEAST one co-host assigned. If an issue causes the host to drop from the webinar, a co-host will be promoted to host to allow the meeting to continue.
- Co-hosts can help the host moderate the Q&A and launch/edit polls. If you anticipate heavy traffic in the Q&A and chat, we recommend including additional co-hosts to help.
- NOT ALL presenters need to be co-hosts, as mistakes can happen when more people have host privileges.
- You can allow all Panelists to share screen by clicking the ^ icon next to Share Screen, going to Advanced Screen Share Options, and allowing All Panelists to share.
- Panelists are the presenters for the Webinar. Panelists will typically be the speaker sharing their video for the attendees to see, and they are invited with a unique panelist link by the host. Some best practices for Panelists:
- Plan to arrive 15 minutes before the start time to test your camera, microphone, and content to be presented with the other panelists.
- Decide when questions from Q&A will be asked by the moderator. In informal events, it may be easier to manage your own questions, but for higher production, it’s best to clarify if moderated questions will be asked during the presentation or held until after.
- Attendees are the audience for your Webinar. Attendees cannot share video, and they can share microphone audio if requested by the Host. Although intended to be "listen-only" for Webinars, attendees can interact with panelists in the following way:
- In-meeting Chat
- Answering Poll questions
- Submitting questions to Q&A
- Raising Hands
Inviting Panelists
1. Panelist invites are managed in the Panelist list of each webinar. Click Edit in the Invite Panelists section to add Panelists.

2. Each Panelist added to the list will be added by their Name and Email Address.
- The Panelist links are unique per person, and they are sent to the Panelist automatically after clicking Save.
- A Unique Panelist link will allow ANYBODY with the link to join the event as a panelist. DO NOT SHARE UNIQUE PANELIST LINKS.

Inviting Attendees
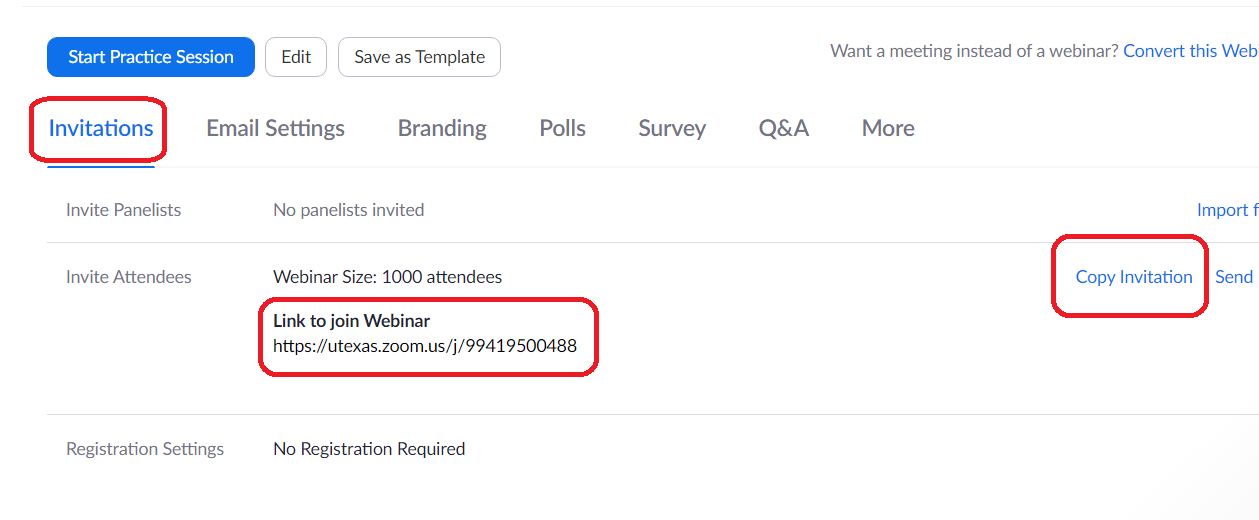
Your attendees will only need the Join link or Meeting ID to join. The Attendee join link can be found in the Invitations section of your Webinar.
Practice Session
The Practice Session allows Hosts to start the webinar with Panelists without launching the event live for Attendees, and it can be a useful tool for ensuring a well produced webinar.
- You can launch and end the Webinar in Practice Session any time in advance of the actual event.
- Use practice sessions to test any microphones, cameras, and presentation materials (PowerPoints, videos, etc).
- Any Webinar settings changed from their defaults during practice sessions will reset once you End the Webinar whether in practice session or live.
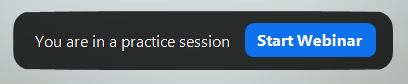
Hosts may click Start Webinar to allow attendees to join and start the webinar.
There is no confirmation when clicking Start Webinar. The webinar will be live as soon as the button is clicked by any host.
Going Live in a Webinar
When it is time to go live:
- Make sure your panelists are ready with cameras and microphones either muted or active as necessary. As soon as a host presses Start Webinar, attendees will begin entering the webinar.
- Please give attendees a few minutes to enter the Zoom webinar before beginning the presentation.
- You can monitor the attendee count in the Participants window to know when attendees have joined.
- If you are streaming to Facebook or YouTube, you can begin the stream after pressing Start Webinar.
- If you do not have automatic recording enabled, you should begin recording after going live.
After your attendees have entered the webinar, panelists may present content as if the Zoom were a meeting, and hosts/co-hosts should manage Q&A moderation, chat moderation, launching or creating polls, and ending the meeting.
Managing what Attendees can see and do
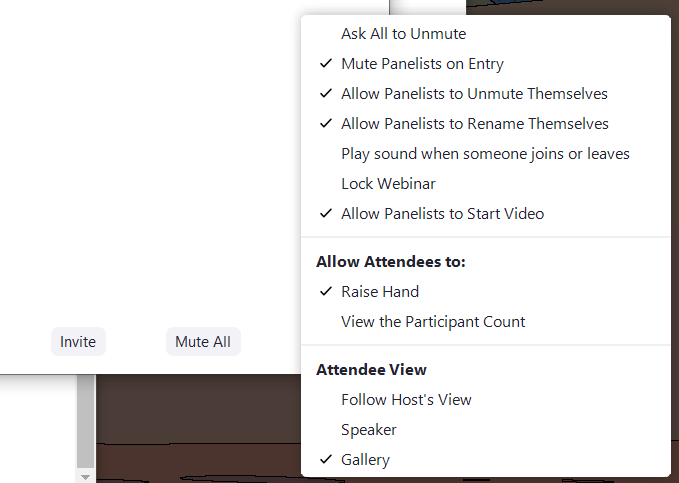
Hosts and co-hosts have a variety of tools to adjust what attendees and panelists can see or do in the meeting by clicking the "..." in the Participants menu.
Participant menu settings:
- Muting options for Panelists can be enabled or disabled:
- Ask all to Unmute - Sends panelists a request to unmute their microphones
- Mute Panelists on Entry - Panelists microphones will be off when joining (recommended on)
- Allow Panelists to Unmute Themselves - When enabled, panelists can unmute themselves without permission from the host. (recommended on)
- Allow Panelists to Rename Themselves - Allows panelists to change their displayed name. This is commonly used by interpreters or support (recommended on)
- Play sound when someone joins or leaves - This plays an audio notification when a new panelist joins (recommended off)
- Lock Webinar - This will lock your webinar from allowing any new participants to join. This can be enabled as a security member after your intended audience is present.
- Allow panelists to start video - Allows panelists to share their camera video (recommended on)
- Allowing Attendees to:
- Raise Hand - This is useful to allow attendees to unmute microphones and verbally ask questions.
- View the Participant Count - This allows attendees to know how many other participants are in the webinar
- Changing the Layout for the Attendees View:
- By default, the Attendee's view will follow the layout that the Host is seeing.
- Layout can be changed to either Active Speaker or Gallery View. More information on layouts can be found here.
- Typically, we would recommend Gallery View, but this is dependent on the format of the event.
- NOTE: Non-Video Participants will NOT show up for Attendees. Even if you see non-video participants (black boxes with names) on your layout, they will not appear in attendees.
After the Webinar
If you are using a temporary webinar license, your license will be automatically removed 16 days after your initial activation request date..
Please make sure to gather any registration, attendance, poll, or Q&A reports after the webinar ends. You can only access your statistic reports within the 16 day period of your license.
Webinar recordings will still be accessible after your license is removed and will follow the 1 year retention policy. The original host of the webinar will receive the cloud recording in their account.